Table des matières
ToggleIntroduction to Cleft Grafting
Hi friends, it’s Vincent from the Terra’Terre nursery. In this article, I will unveil all the secrets of the cleft graft. If you are interested in the subject of fruit trees and grafting, this article is for you. We will explore the classic cleft graft as well as its variants. Let’s go there to discover the techniques and tips for successful transplants!
If you prefer video, here’s the latter:
Classic Split Graft
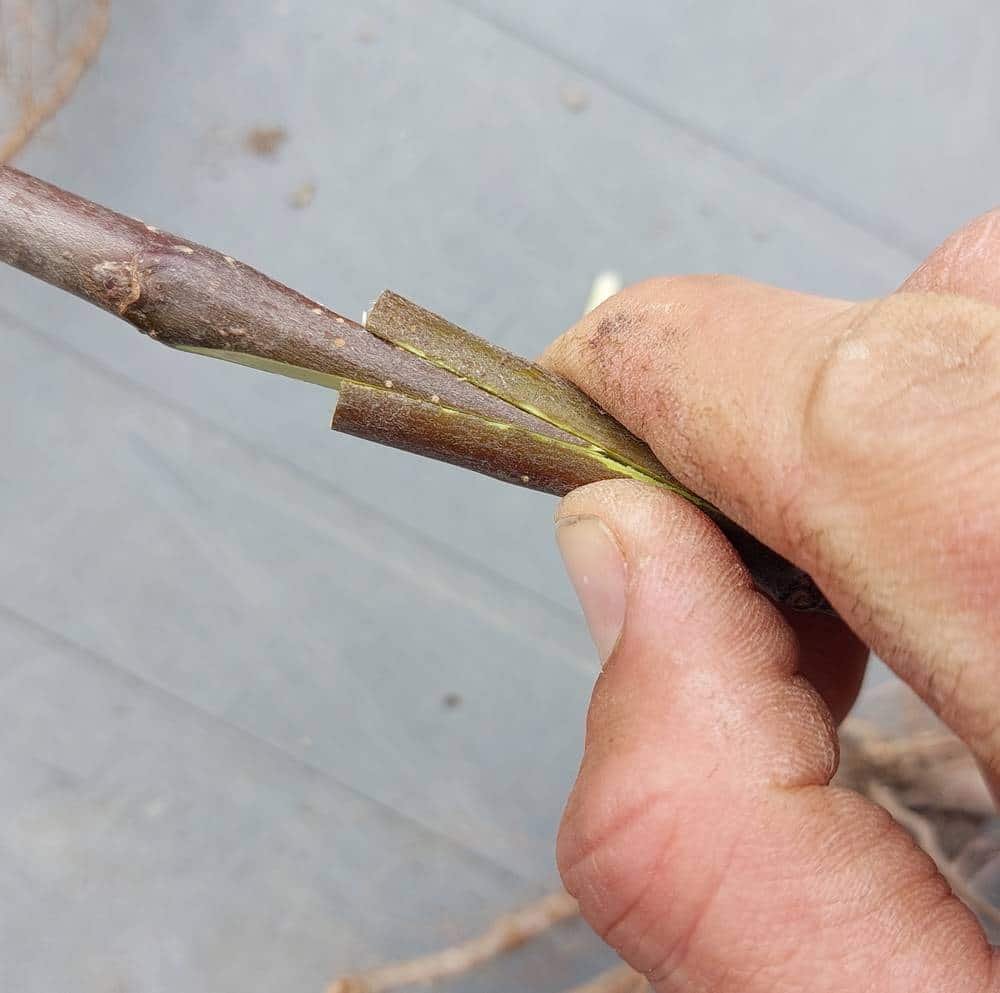
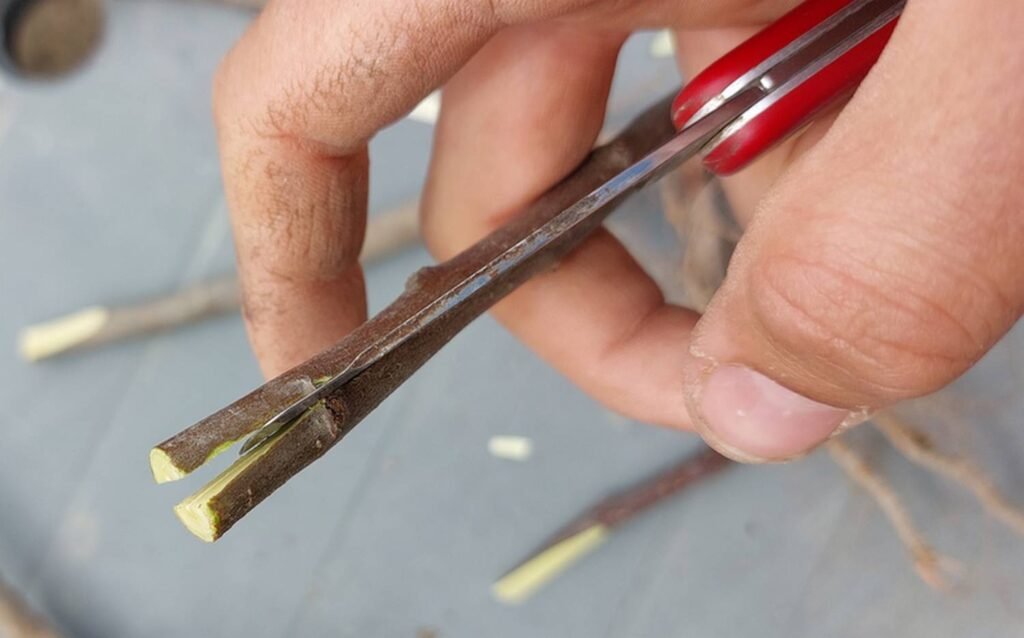
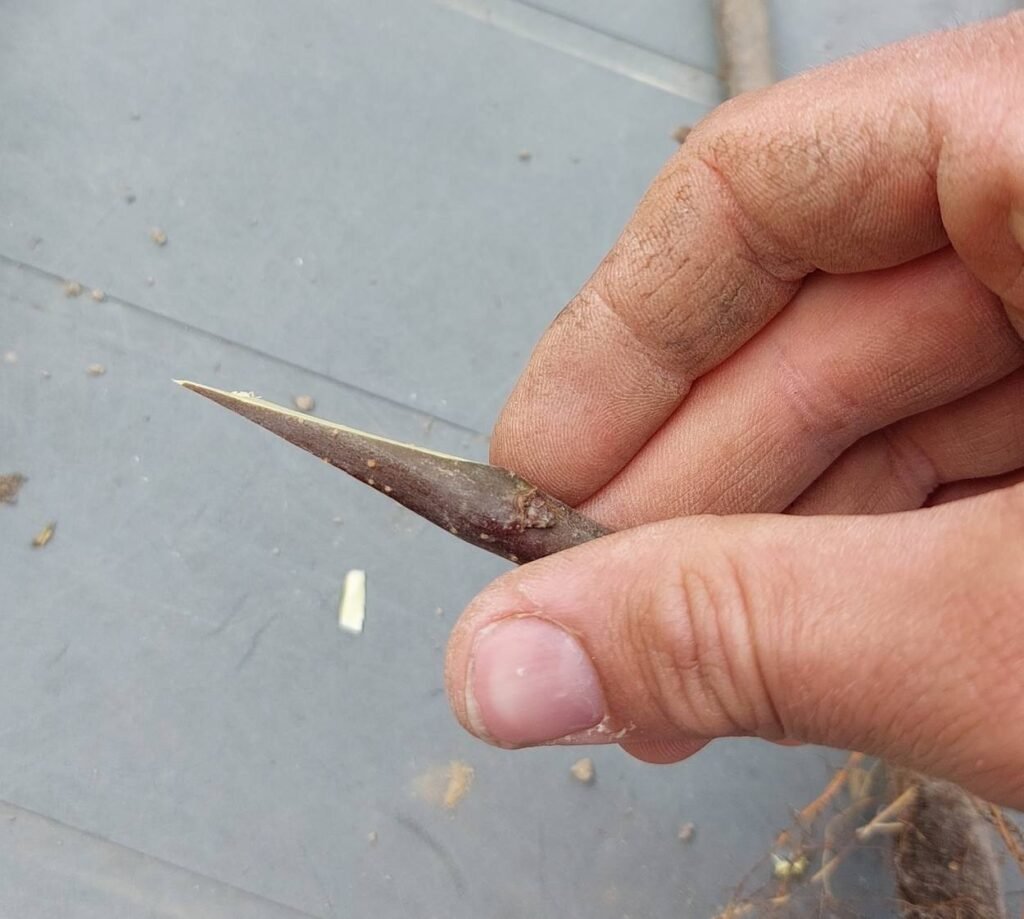
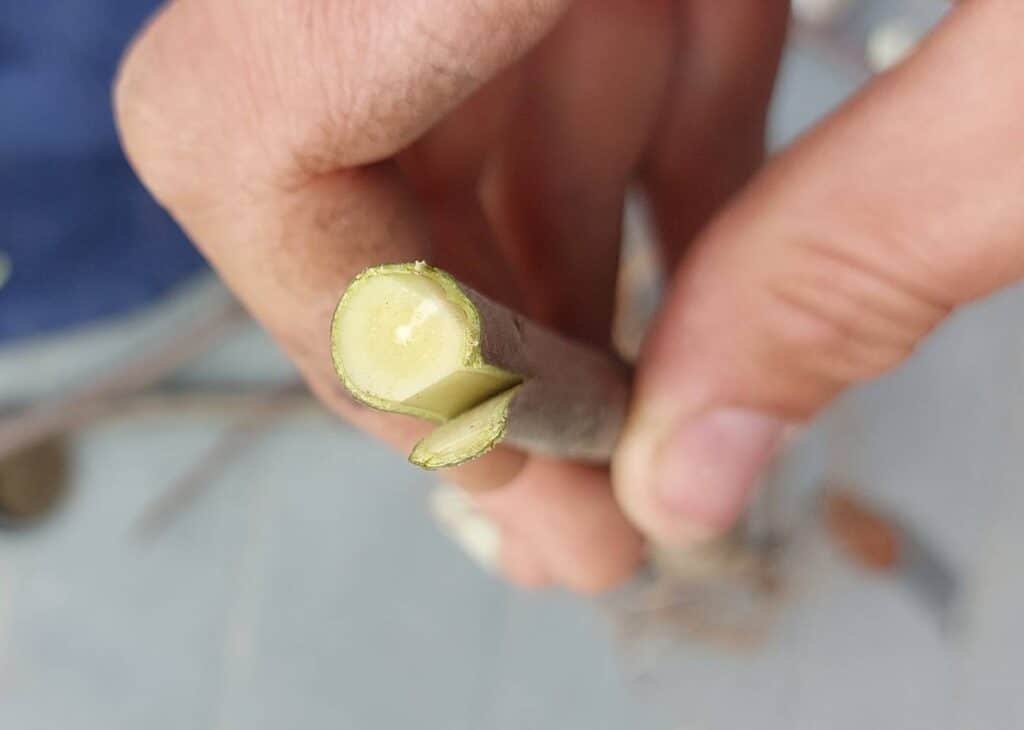
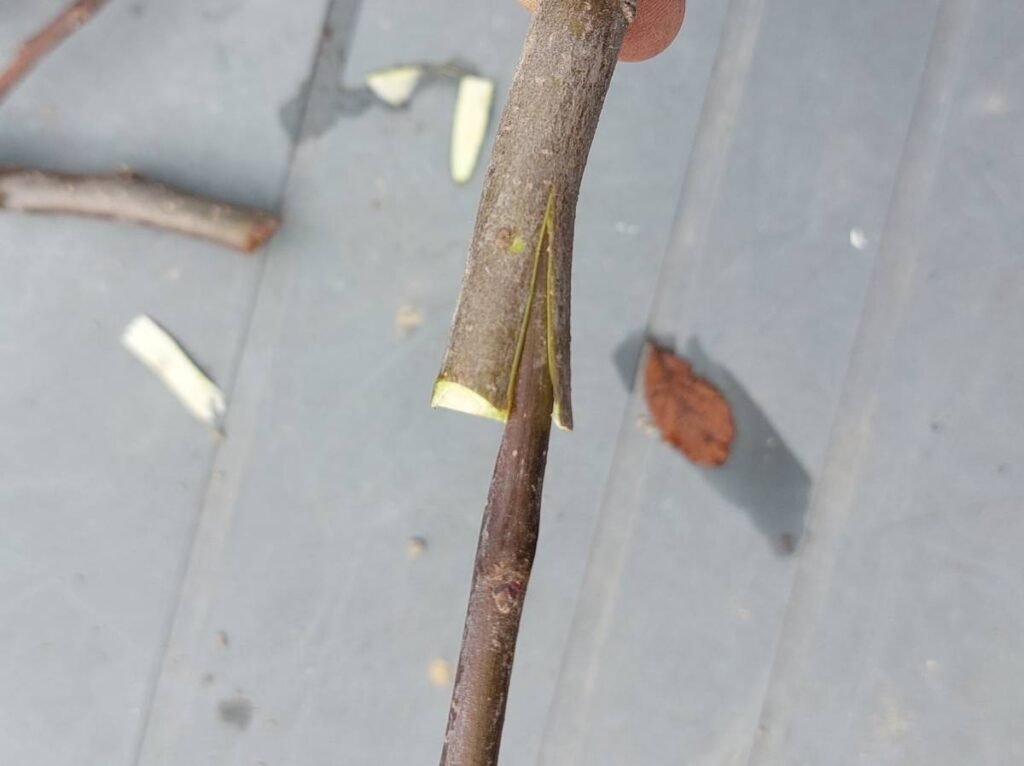
Classic split grafting is a simple and effective method of grafting your fruit trees. Here’s how to do it:
Preparation of the Graft
- Choose the graft : Select a graft with two eyes.
- Trimming the scion : Form a point by making two beveled cuts.
- Cut the scion : Make sure the cut is straight and sharp for easy insertion.
Rootstock Preparation
- Select the part of the rootstock : Choose a section with a similar diameter to the scion.
- Make a straight cut : Use pruning shears to make a clean, straight cut.
- Make a slit in the center : Insert a sharp knife into the center of the cut and make a slit without removing the knife immediately to keep the slit open.
Graft Insertion
- Insert the scion into the slit : Align the cambia of the scion and rootstock.
- Ensure contact of the cambiums : This is crucial for the welding and the success of the graft.
- Ligate and protect : Use putty or wax to protect the grafted area and prevent infection.

Variant n°1: Split graft with smaller graft
This variant is used when the scion is smaller than the rootstock.
Preparation of the Graft
- Trim the scion : Make two bevels as for the classic graft.
Rootstock Preparation
- Make a slit on the side : As with the classic slit graft, make a cut in the center of the rootstock. Cut off the excess rootstock that is not touching the scion.
- Insert the scion : Glue one side of the scion cambium with the one side of the rootstock.
Graft Insertion
- Align the cambium to one side : Make sure the cambiums are in contact to ensure soldering.
- Ligate and protect : Use putty or wax to protect the grafted area.
Variant n°2: Offset Slit Grafting
This variant consists of shifting the slot to facilitate the alignment of the cambiums.
Preparation of the Graft
- Make a large bevel : Make a beveled cut on one side of the scion.
- Make a small bevel : Make a smaller cut on the other side to form an asymmetrical tip.
Rootstock Preparation
- Select the edge of the rootstock : Choose the place where the cambium of the scion will best coincide with that of the rootstock.
- Make an offset lunge : Make the lunge slightly offset for better alignment of the cambiums.
Graft Insertion
- Insert the graft : Align the cambiums and insert the scion into the offset slot.
- Ligate and protect : Use putty or wax to secure the graft.
Pros and Cons of Cleft Grafting
Benefits
- Ease of Performance : Split grafting is easy to perform, even for novices.
- Versatility : Can be done on a table or in the field.
- Compatibility : Suitable for different species of fruit trees.
Cons
- Aesthetics : The graft point may be less aesthetically pleasing.
- Healing : Healing may be less clean due to the large wounds created.
Conclusion
In summary, split grafting is an accessible and effective technique for grafting your fruit trees. Although the graft point may be less aesthetically pleasing and healing can pose some challenges, this method is still a great option for amateurs and transplant novices alike. If you want to explore other grafting techniques, stay tuned for future videos where I’ll talk about chiping and other methods. Feel free to share this article, ask your questions in the comments, and subscribe so you don’t miss anything. Happy grafting to all!
To find all my fruit trees, go to >> my catalog <<
Finally, if you want to see all my tips in video, don’t hesitate to check out my YouTube channel:


